No is a great word. No to unreasonable people. No I don’t want to do that. Just no. I teach 13 year olds for a living and I would get nowhere without no. If I meant maybe, I would say maybe. Put your phone away please Florian. Were you listening to the instructions or were you talking to Moritz? Alina can you stop doing that please, it’s very annoying.
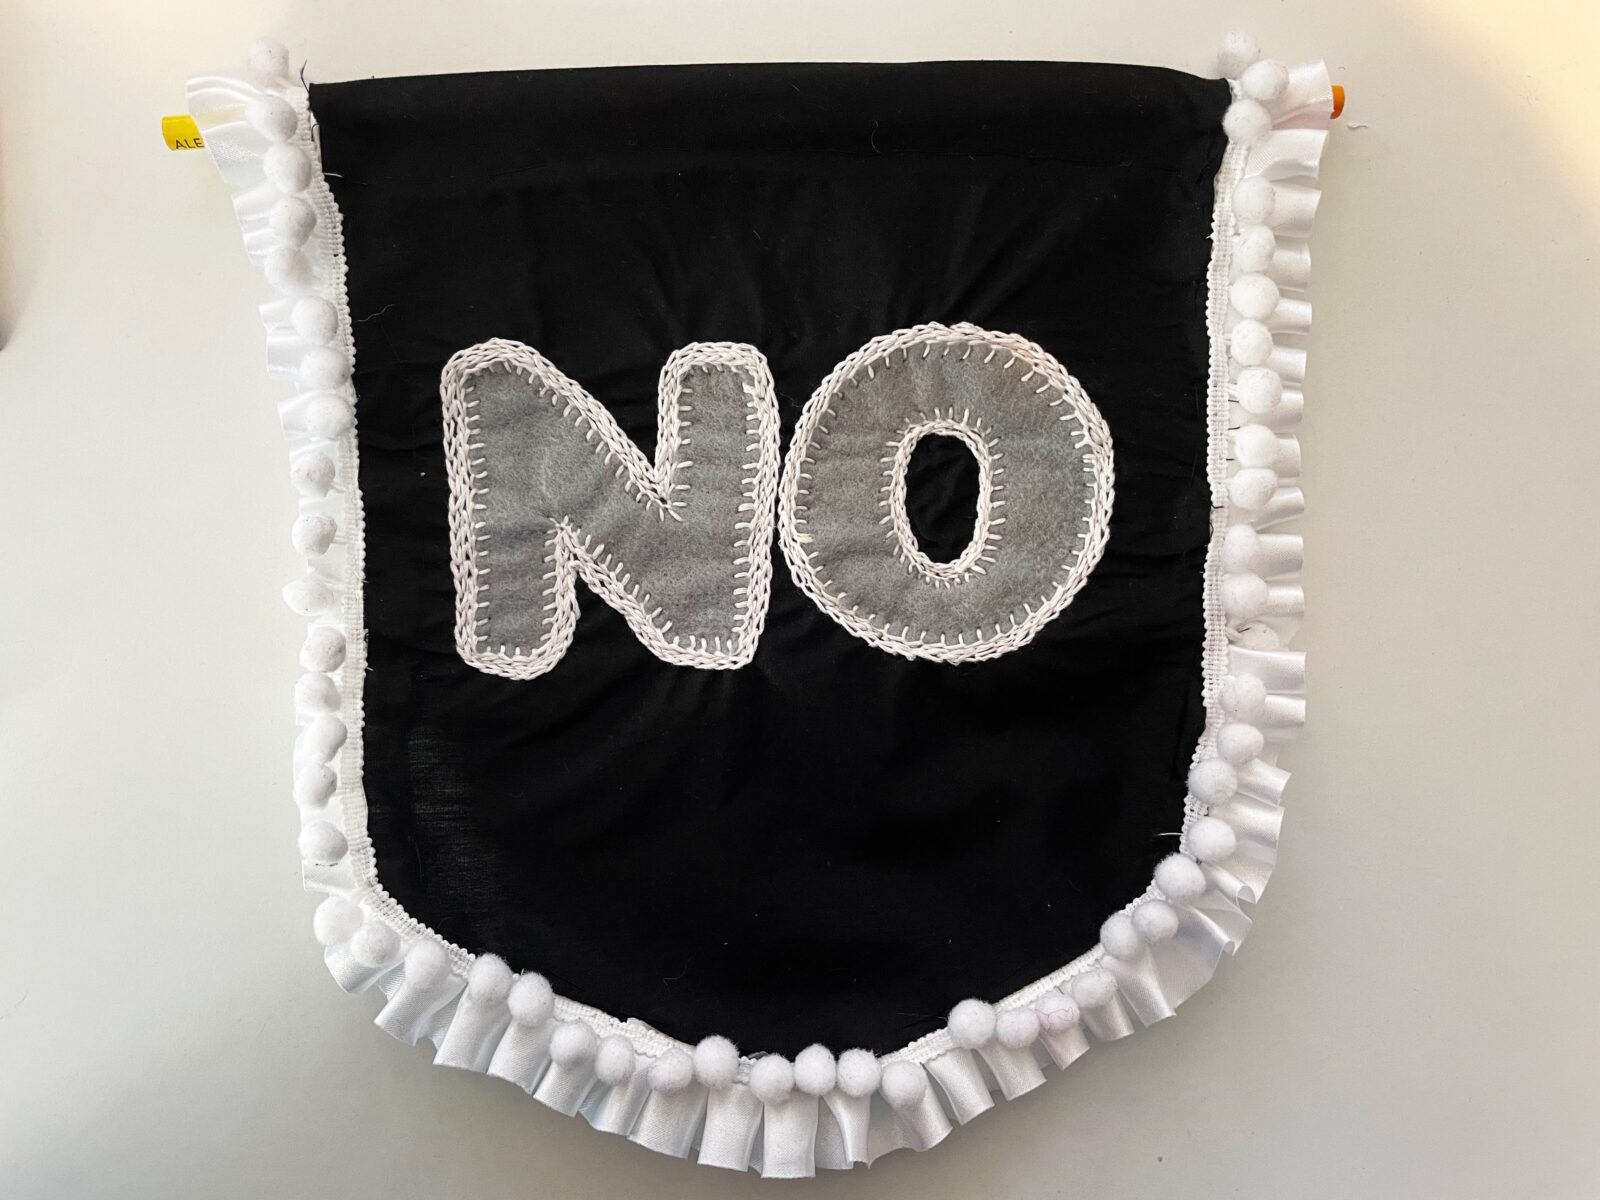
There’s lots of cute motivational banners around with Good Vibes Only! You Can Do It! You Go Girl! on them, but really, that’s not what’s needed. Crushing negativity on a jet black background please.
I was going for an aesthetic that was part fancy pony, part Victorian funeral. I originally wanted some marble pattern black watered silk for the background to go full funeral/altarcloth, but it turned out to be really expensive, so I just got plain black.
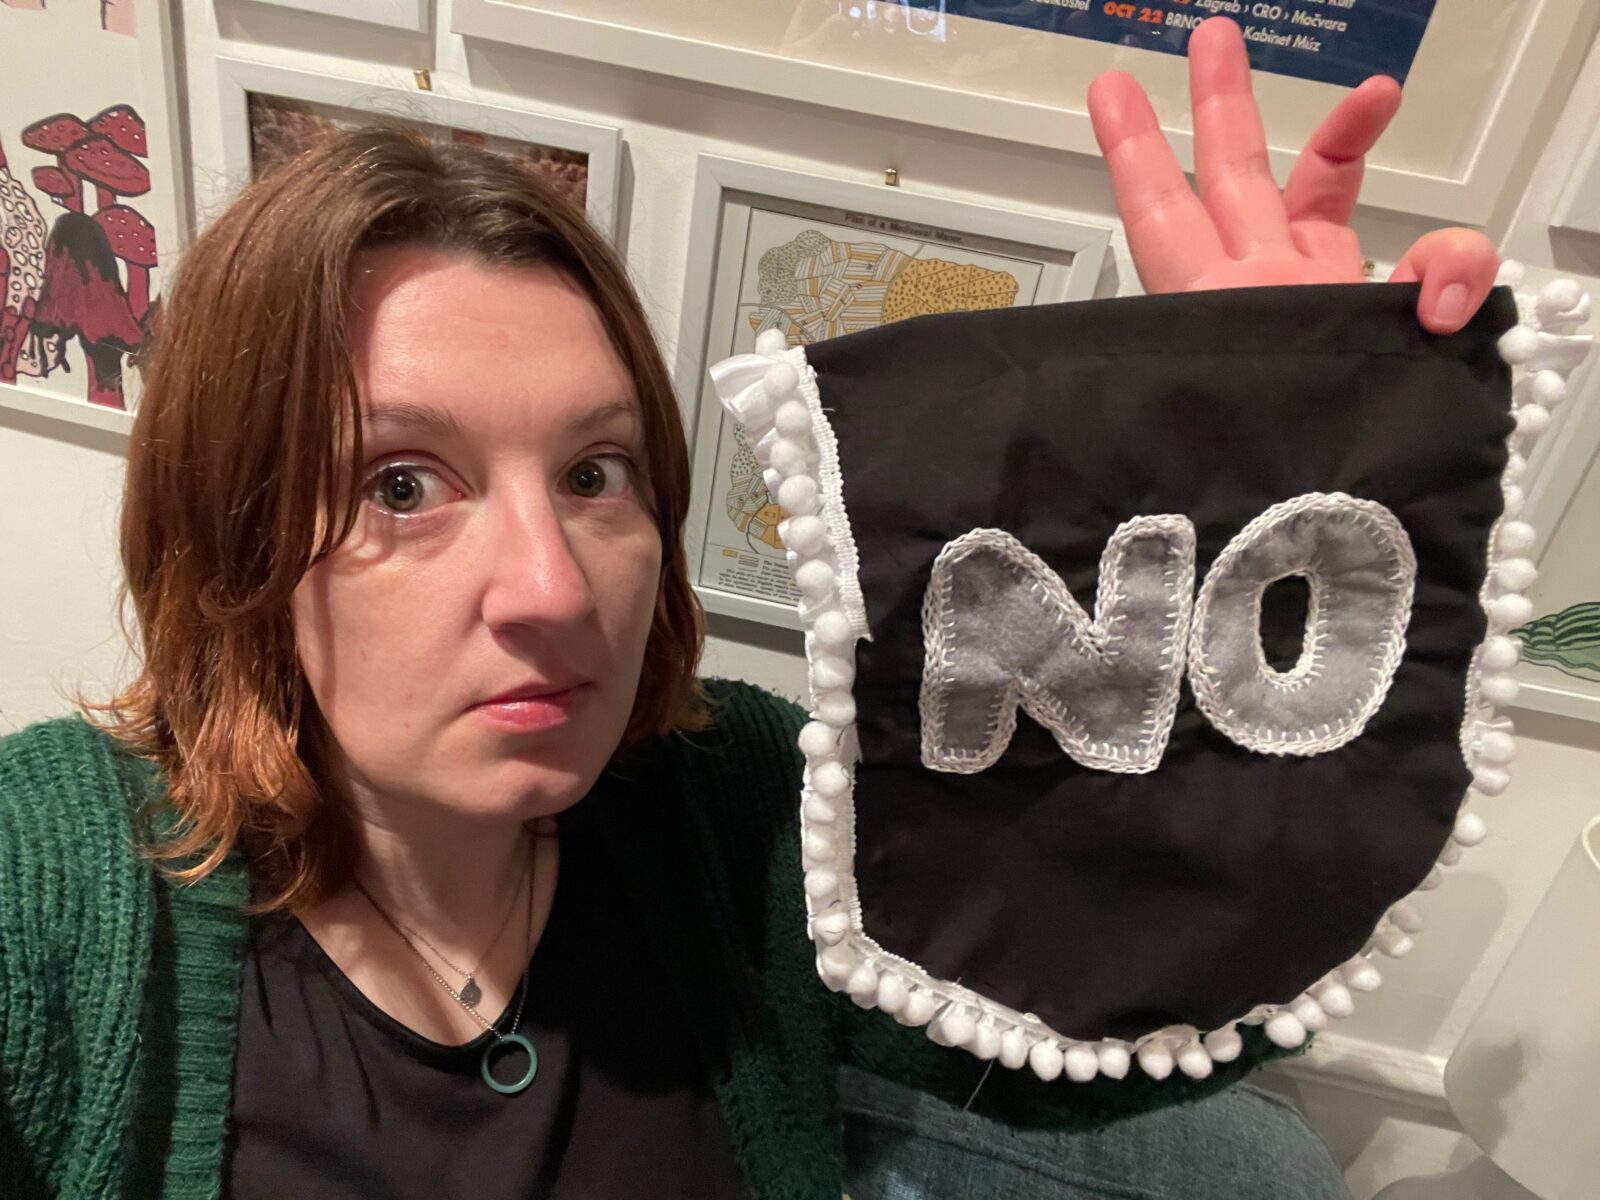
Here I am holding the banner after I finished sewing it, with weird swollen allergy joints on my hand. I did some of it at a craft club, and several people asked me “did you make this because you’re always saying yes to people”, and I laughed. The opposite in fact.
Here is the template to save and print out. It should measure roughly 20x25cm. It’s provided free of charge, but you may not use it for any commercial purposes, only personal projects. I’ve written the instructions assuming you can sew, if you can’t maybe you should start elsewhere, this is fiddly to make for beginners. (Although there are links for how to do the embroidery stitches).

Materials:
Black fabric 30x30cm
Iron-on interfacing 30x30cm
Grey felt 20x10cm
White pompom trim 75cm
White frill trim 75cm
White embroidery floss
25cm dowel
Black cord
Black sewing thread
White sewing thread
Embroidery needle with larger eye
Standard needle
Pins
Instructions:
- Iron interfacing onto the back of fabric
- Cut out background shape
- Cut out N and O from the felt
- Baste the felt letters onto the background using a contrasting thread
- Using the whole skein of embroidery floss, decorate the edge of the letters with one row of blanket stitch
- Continue decorating the letters with two rows of chain stitch, and unpick the temporary basting
- Sew the frilly trim onto the back of the background using black thread
- Sew the pompom trim onto the front using white thread, to hide the raw edge of the fabric (I messed this up a bit in one place but it doesn’t notice too bad)
- Turn over the top of the banner and stitch down with black thread to create the hanging loop. (I also used some bias binding here, which isn’t strictly necessary.
- Put a dowel through the loop, and attach string to hang.
Leave a Reply